Dell 2707WFP: Looking for the Middle Ground of Large LCDs
by Jarred Walton on April 4, 2007 10:00 AM EST- Posted in
- Displays
Appearance and Design
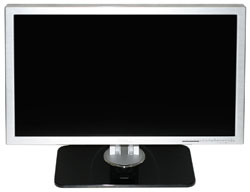
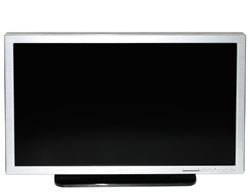
If you've seen/used any of Dell's other LCDs, the difference in appearance and styling of the 2707WFP is immediately noticeable. Gone are the black bezels and silver base stand. In their place we have a brushed aluminum bezel, a base stand with a black mirror finish, and various chrome highlights. Opinions on aesthetics will vary by individual, but we certainly like the new styling of this LCD.
Like the 2407WFP, the bottom right corner on the front of the LCD has six buttons. The left button switches among the various input options, and the next button controls the picture-in-picture settings. The middle button accesses the on-screen display (OSD) and also functions as the select button within the OSD. The next two buttons are for left/up/decrease and right/down/increase, and on the far right is the power button. The power button also glows blue when the LCD is on or orange when the display is in sleep mode. To the left of the six buttons are five LEDs that indicate the active input, although these LEDs only light up during the input select process and are otherwise off.
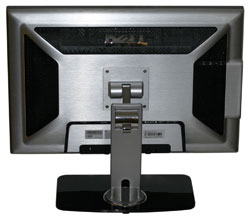
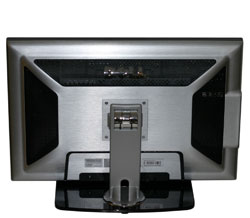
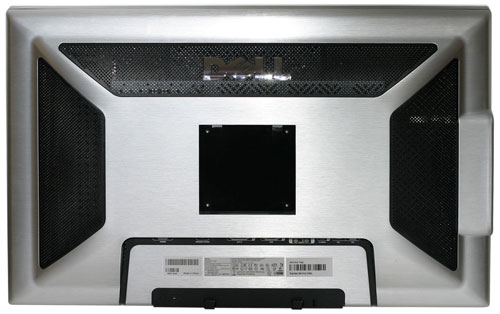
The rear of display continues the silver brushed aluminum finish, with black ventilation areas on the sides and top. You can also get a better view of the base stand here, and the highly reflective finish is obvious. Fingerprints can be a problem, but Dell conveniently includes a nice nonabrasive cloth to help keep things clean. Unlike many other LCDs, the 2707WFP comes fully assembled. If you want to remove the base stand, you'll have to remove the four T10 Torx screws, at which point you can access the standard VESA wall mount.
Above is a shot of the rear of the unit without the base stand installed. The lower image shows the input ports, as well as two of the extra USB ports. To the right of power socket you can see a power connector for the optional AS501 speaker bar attachment. It's the same model as the 2407WFP uses, although it's interesting that the 2407WFP specifically lists speaker accessories during the configuration process while the 2707WFP does not. That's an oversight of the configurator that could use correcting, although for Dell PCs this is not an issue.
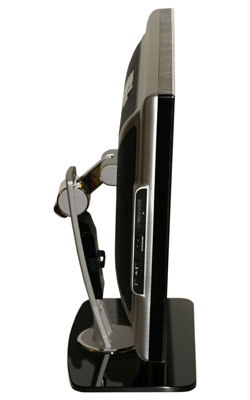
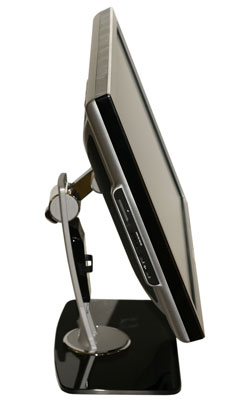
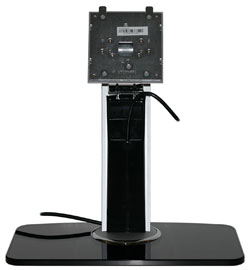
Here you can see the left side of the panel with the flash memory readers and the other two USB ports. You can also see the tilt mechanism in full swing, ranging from a 5° forward tilt to a 30° backwards tilt. The mounting arm of the base stand is quite a bit different than other Dell LCDs, apparently going for something of a "chrome robot" theme. [Ed: Someone actually mentioned Robocop during the course of our evaluation.] However, while the base stand looks different from most other LCDs, it still functions quite well.
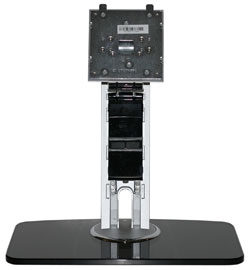
The base stand also helps with minimizing cable clutter by providing for cable routing. A black plastic cover can be removed from the mounting arm, and then you can feed the various cables that you plan on using through the slot in the base stand. After that's done, simply slide the black cover back into place. You'll want to provide a bit of slack on the cables, but as a whole the cable routing works quite well.
If you've seen/used any of Dell's other LCDs, the difference in appearance and styling of the 2707WFP is immediately noticeable. Gone are the black bezels and silver base stand. In their place we have a brushed aluminum bezel, a base stand with a black mirror finish, and various chrome highlights. Opinions on aesthetics will vary by individual, but we certainly like the new styling of this LCD.
 |
 |
| Click to enlarge | |
Like the 2407WFP, the bottom right corner on the front of the LCD has six buttons. The left button switches among the various input options, and the next button controls the picture-in-picture settings. The middle button accesses the on-screen display (OSD) and also functions as the select button within the OSD. The next two buttons are for left/up/decrease and right/down/increase, and on the far right is the power button. The power button also glows blue when the LCD is on or orange when the display is in sleep mode. To the left of the six buttons are five LEDs that indicate the active input, although these LEDs only light up during the input select process and are otherwise off.
 |
 |
| Click to enlarge | |
The rear of display continues the silver brushed aluminum finish, with black ventilation areas on the sides and top. You can also get a better view of the base stand here, and the highly reflective finish is obvious. Fingerprints can be a problem, but Dell conveniently includes a nice nonabrasive cloth to help keep things clean. Unlike many other LCDs, the 2707WFP comes fully assembled. If you want to remove the base stand, you'll have to remove the four T10 Torx screws, at which point you can access the standard VESA wall mount.
 |
 |
| Click to enlarge |
Above is a shot of the rear of the unit without the base stand installed. The lower image shows the input ports, as well as two of the extra USB ports. To the right of power socket you can see a power connector for the optional AS501 speaker bar attachment. It's the same model as the 2407WFP uses, although it's interesting that the 2407WFP specifically lists speaker accessories during the configuration process while the 2707WFP does not. That's an oversight of the configurator that could use correcting, although for Dell PCs this is not an issue.
 |
 |
| Click to enlarge | |
Here you can see the left side of the panel with the flash memory readers and the other two USB ports. You can also see the tilt mechanism in full swing, ranging from a 5° forward tilt to a 30° backwards tilt. The mounting arm of the base stand is quite a bit different than other Dell LCDs, apparently going for something of a "chrome robot" theme. [Ed: Someone actually mentioned Robocop during the course of our evaluation.] However, while the base stand looks different from most other LCDs, it still functions quite well.
 |
 |
| Click to enlarge | |
The base stand also helps with minimizing cable clutter by providing for cable routing. A black plastic cover can be removed from the mounting arm, and then you can feed the various cables that you plan on using through the slot in the base stand. After that's done, simply slide the black cover back into place. You'll want to provide a bit of slack on the cables, but as a whole the cable routing works quite well.


39 Comments
View All Comments
AnnonymousCoward - Friday, April 6, 2007 - link
Slightly off topic, but what's the easiest way to get color profiles to apply in games, and not just Windows?JarredWalton - Friday, April 6, 2007 - link
If you set a color profile, it applies to everything but overlay. So games automatically use it, AFAIK. It's only video content that has problems.AnnonymousCoward - Friday, April 6, 2007 - link
You're probably right, since I tried changing the color profile to make everything hot pink, and the game also looked that way.Whenever Windows is booting up, the desktop first looks slightly lighter, and after a second it seems like the color profile kicks in. When I run the game Dark Messiah, right before the screen switches to the game, the desktop switches back to that lighter appearance, so it doesn't look like it's using the profile. I've also seen a few sites indicate that profiles don't apply for games: http://www.hex2bit.com/products/product_mcw.asp">http://www.hex2bit.com/products/product_mcw.asp says "...to prevent other programs from changing the color profile Windows uses. This is especially important to gamers as most games will change the color profile Windows uses." and http://www.hardforum.com/showthread.php?t=1064124&...">http://www.hardforum.com/showthread.php?t=1064124&... someone said "Also, that color profile won't effect videos, games, or your mouse cursor. I calibrated through my spyder2..."
sm8000 - Wednesday, April 4, 2007 - link
"single-link with a very limiting 1280x800 resolution"Isn't single link's max res 1920x1200? I'm pretty sure it is. Is the article saying dual link panels by design won't display more than 1280x800 on single link?
JarredWalton - Wednesday, April 4, 2007 - link
Right. There are no scaler ICs for 2560x1600 right now, but apparently they can manage a simple doubling of resolution. If you use a 30" LCD with a single-link DVI connection, they will only support up to 1280x800. In the case of the HP LP3065, any other resolution ends up being garbled (i.e. the BIOS, POST, and boot sequence is illegible). Within Windows, you can change the resolution and apparently the GPU will handle the scaling, but outside of Windows you're basically out of luck unless you're running 1280x800.jc44 - Wednesday, April 4, 2007 - link
I feel the need to take issue with the assumption in the article that a denser pixel pitches must lead to smaller text. OK - that certianly happens by default, but it is possible to increase the number of dpi that windows associates with amonitor and that should increase the size of the displayed text. I'll admit that support is somewhat patchy with web pages being amongst the greatest offenders - but in general it works.Personally I'm a dpi junkie and normally use a 204dpi monitor which can lead to somewhat interesting results on applications & web pages that are convinced that all monitors in the world run at 96dpi!
These days you don't need to spend a lot on a graphics card to a a dual-link dvi connector - I'm not sure where the bottom of the range is but an nvidia 7600 costs less than £100 and can be found with one dual + one single link DVI connectors.
JC
JarredWalton - Wednesday, April 4, 2007 - link
Adjusting DPI is certainly possible, and I believe this is one of the areas that Vista is supposed to be a lot better than XP. (Anyone able to confirm that?) However, my personal experience with modifying the DPI has been less than stellar. I usually end up just increasing the font size in Firefox, using the magnification in Word, etc. There are plenty of other applications that have no respect for the Windows DPI setting.nullpointerus - Wednesday, April 4, 2007 - link
Vista is definitely better than XP in this regard, but there are still many areas that could use some polish. For example, Vista still appears to use tiny bitmapped icons, which do not scale very well on the high-dpi title bar and task bar. Moreover, many third-party applications and even many Microsoft applications still have icons and images that scale horribly without the standard 96-dpi setting.Nonetheless, font-handling and layout for non-Aero-native applications has improved dramatically since the early Vista RC1 release; instead of merely upscaling the fonts and controls into a blurry mess, the layout engine does proper spacing and the font engine draws crisp, high resolution fonts. Visual Studio 2005 shows *major* progress in this regard.
For anyone interested in getting a higher density display and using the Vista DPI setting, I definitely trying it first. You could enable 120 dpi on your old monitor and stand back an extra foot or so to mimic the effect of a lower pixel pitch. Or get a friend to do this if you do not have Vista on your own computer.
strikeback03 - Wednesday, April 4, 2007 - link
I always reduce the size of my windows icons anyway. they are huge in the stock setting.on a related note, anyone know how to change desktop icon size and spacing in Gnome/Ubuntu? do you need a whole new theme? icons for mounted drives are way large.
nullpointerus - Wednesday, April 4, 2007 - link
typo: I definitely recommend trying it first.